31 Mart 2014 Pazartesi

Internet Download Manager (IDM) 6.19 build 3, Crack & Patch

Internet download manager (IDM) is a very useful download acceleration tool with file segmentation technology to accelerate your downloads of video, music, document and other important files. IDM increases download speed by up to five times with resume and schedule capacity. Comprehensive error recovery and resume capability will restart broken or interrupted downloads due to lost connections, network problems, computer shutdowns, or unexpected power outages are outstanding for individuals. Seamless integration into major browser like Microsoft Internet Explorer, Firefox, Google Chrome, Opera is considered to be very useful and through which IDM handles your downloads automatically.


Step One: Download Latest Version of IDM from Official Site

Official site address: http://www.internetdownloadmanager.com 


Step Two: Download Latest Working Patch

Download Link: Patch by ProphetHacker    Dropbox Link

Step Three: Follow Instructions Below

  1. Install IDM downloaded from official site;
  2. Cancel/Close all massage from IDM about fake serial and bla bla bla :)
  3. Close IDM from system trey if it is still open (IDM must be closed during patching process)
  4. Open Patch file by clicking on "Patch (New) - IDM 6.19.exe" and click OK if it shows any warning, a new window will open with music;
  5. Click on "Patch" button and show IDM "Program File", it is normally C:\Program Files\Internet Download Manager;
  6. Select IDman.exe and Click OK, Patching is done!
  7. Now click on "AutoReg" button and then exit. Enjoy...!!!

Setup Multiwindow on Android through XMultiWindow

One of the major downside to many Android phones and ROMS is that they don't include multi-window except Samsung devices, but now you can get multi-window on your very own Android Device If possible try to get a AOSP ROM for your phone for best results.

You get an app called XMultiWindow that allows you to manage which apps you want to be enabled for multi-window. After that just enable multi-window and you're good to go! You can easily manage two apps side by side in both portrait or landscape mode! 


How to get multi-window on Android
Note:
You must be rooted!
This method may not work with every Android device, it mainly depends if your on an AOSP ROM or not!
Easy Android Customization through xposed framework
1. Download Xposed Installer and XMultiWindow APKS to your phone from the links below.
2. Install Xposed Installer and grant SuperSU permission. Remember you need to be rooted!

3. Install XMultiWindow and then activate it within the Xposed app.

4. Open up the XMultiWindow app, set it up, and start multitasking!


How to recover delete & lost data on Android (rooted or not)

Who amongst us hasn't accidentally deleted photos or videos without realizing it? No need to panic: there are ways to recover your data whether you're rooted or not. Time is always of the essence though: do not save anything else to your device until you attempt recovery. Turn off your Wi-Fi and 3G/4G connection so no automatic updates occur and overwrite your data before you've had a chance to get your lost files back.


If you are NOT ROOTED

If you don't know what this means, you are most likely not rooted

The first thing to do is to connect the phone memory (internal or external) as a Mass Storage Device to your computer, ie, via USB. Although you can connect your Android directly, you can also use a Micro SD Card Adapter to attach your microSD via USB. If external memory is the issue, I'd recommend an adapter because not all Android phones manage memory in the same way and the cleaner the connection between your precious data and the recovery, the better.

Then download Recuva (you can use either the paid or free version), which is a program to recover files. You can also use other programs, like Coolmuster or Wondershare Dr. Fone (which requires root), but Recuva is a great free tool.
Note: Normally, for most of these programs to work, your memory must be formatted as FAT32, NTFS or similar. If your memory card format is not recognized for some reason, you can just do a complete copy of its contents to your computer, reformat the memory card as FAT32 and then dump the copied files back on it and continue the process.

When you run Recuva, the first thing to do is select the type of file you want to recover: Pictures, Videos, Music, Documents, etc. The option to restore from a specific location is available and you can even set a specific folder to attempt recovery from. Note that Recuva will only display locations it can actually recover data from. Just follow the prompts in the program.

Important: When you finish recovering your deleted files try to save them on a different device from the one on which they were originally lost: this can sometimes cause conflicts and damage recovery. So if you are recovering files from your smartphone, record them on the hard disk of the PC and then transfer them over later, once they're safe and sound.

If you have ROOT

1. Download UNDELETE 

2. The application is very simple. The first thing to do is to select the storage device from which you want to retrieve your data (can be internal or external memory).

3. Then you scan the selected device.

4. The process may take between 2 and 10 minutes, depending on your memory size and the amount of stored data.

5. When finished you will be presented with retrievable data in several tabs: Files, Pictures, Music, Videos, Documents and Files. Recovered data returns to its place of origin, ie wherever it was saved before they were lost.

6. This option may only work partially (if there is a problem with your memory). In that case, proceed to the Recuva steps above, or use Wondershare or another root recovery program.  


How to watch Latest TV shows and Movies for free on your Android


Have you ever wondered if it were possible for you to watch movies and TV shows without having to pay for Netflix or any other kind of streaming service? We have and we have found a way to do it too. Just sit tight and keep on reading and we will show you how you can watch movies and shows without any hassles or complications for free on your phone.

The first thing you will have to do is download an app called Show Box. The app used to be on Google Play but was removed so you will have to sideload it on your Android phone. You can find the application package you will have to download on the developer's website. Before you can sideload it though you will need to make sure that you have enabled third-party installs on your phone. Attempting to install it should allow the prompt to enable third-party installs to show up so it really isn�t a big deal.
Once you open up the app and it finishes loading you can immediately see the wide array of movies and TV shows you can watch for free. If you look on the top of the app, you can choose between movies, TV shows, and other such categories in order to sort through the amount of shows and movies in the app.
Once you pick a movie you wish to watch, you can simply tap on it and it will take you to a screen where you can  view the movie or TV show poster, read a short description about it and also view its IMDB rating. You can switch the quality in case you have a slow internet connection and you do not want the movie to lag and you can also watch the trailer first if you are unsure about the movie. You can also choose between downloading the movie or streaming it right off the web.
TV shows pretty much work the same way too. The updates section is one that deserves a mention. You can view the new releases within the app from this tab and when something is available in higher quality, an update will also be posted about it in the section as well.
The downloads section aggregates all media that has been downloaded through the app and shows you how the download is progressing as well. The app doesn�t use the built-in Android downloader so you have to keep track of the progress from within the app.
That�s just about it. Now you can watch your favorite TV shows right off your Android phone. If you have tried out this service please leave a comment below with your opinion on it and we will get back to you.

29 Mart 2014 Cumartesi

How to share your Android net connection with your PC

On the road and need to jump onto your laptop with no free public WiFi in sight? Maybe your Internet connection at home is down? Whatever the reason, if you�ve got an Android smartphone with an active mobile data connection, either 3G or 4G, you can share it with your PC through the tether feature. This will allow you to use your smartphone network connection to connect to the Internet on your computer.
This connection can be done via a few ways: your device can act as a wireless hotspot, the signal can be transmitted via Bluetooth, or you can provide the connection by plugging in your smartphone via USB cable. The method we are highlighting works for any Android device running Android 2.2 or higher. If you�re unfortunately running Android 2.1 or lower, you can use an app such as PDANet or Easy Tether to do the same things.
Always remember: this comes at a cost. If you�ve got a limited data plan, you may find that you�ll eat up your monthly allotment much faster when tethered to a PC. If you�ve got an unlimited plan, go crazy

  • Go to Settings > Wireless & Network > More > Tethering & Portable Hotspots


**  Tick the Portable Wi-Fi hotspot option and then click Setup Wi-Fi hotspot. You�ve also got the option for a Bluetooth and USB tethering options if you want to enable them instead. We�ll concentrate on the Wi-Fi option.

** This will enable to edit the network name you want displayed and choose a password. Once done, click Save.
*      Once done, you�ve got a hotspot being broadcast! Go to your PC and you should find it in your list of wireless networks.
          Related Articles ::Find a a Hidden Wireless Networks
                                       
  1. How to see who's stealing your WiFi and how to block them on Android - 


How to Broadcast (bcc) a WhatsApp message and what it means

When living abroad or in a different city than your family and friends, it sometimes gets hard to keep in touch. Nowadays most people are using WhatsApp (though this may have decreased due toseveral pesky reasons) which makes it a lot easier to get in touch. Even aunts, uncles, grandmas and grandpas are catching on. A great way to save time yet still give others updates or just share some news, is to broadcast a message to various people within a broadcast list.  This is just like the bcc function (blind carbon copy) in email. The best part is that each person won�t know that the message is also sent to others.
First you will have to set up a broadcast list with the people that should receive common messages in the future, like your extended family for example or perhaps a group a friends, study group to set up home work sessions or your children. There are many different scenarios here.
1. Open the WhatsApp application.
2. From the main chats screen, hit the menu button of your smartphone, which is either one of the capacitative or the action menu button on the top right corner.


3. In the �New broadcast list� page, hit the + symbol which will bring up all of your contacts. Scroll through and check the boxes next to the names you would like in your group.
4. Once this is done, hit �Create�.
5. WhatsApp reminds you that only users that have your phone number in their address book will get the message.

6. After you have created this group, you can either send a message right away or go back to this group whenever you need it in the future. You will see a little loudspeaker symbol next to the usual message timestamp.
7. The good thing is, the others won�t be able to see the contact names or phone numbers. They will get the message as a normal message and when they reply, you�ll get a normal message from that individual contact in your Chats screen, not in the Broadcast List. It�s really a one-way street.
You can also edit the group after having made it, it�s not set in stone. To do this, open the Broadcast List once again and hit the menu button. Select Broadcast list info. Here you can choose a name for that group, add recipients, remove them or delete the entire list completely.
This list is pretty useful in my opinion. It keeps the anonymity of each person while allowing you to write many at a time and save time

How to see who's stealing your WiFi and how to block them on Android

Have you ever wondered why your internet connection is being so laggy? This is probably a good time to get suspicious of your neighbours who might be using your WiFi network without your permission. Yes, you can set up a password, however there are ways to bypass this. So what should you do to block an intruder who is infiltrating your connection? The answer is simple: with a smartphone! Today we will tell you how it is done.
Like almost everything to do with Android, you can find out who has been sneaking some of your WiFi with an application. There is a free network tool which you can download right from the the Google Play Store called Fing.
The first thing you have to do is connect to your smartphone or tablet to the WiFi network you want you want to test. Now simply download the application, which you can do by pressing the install button below.
Once the installation process is complete, the tool can easily get started finding the trespasser. At the top of the app�s main page, you will see the name of your network as well as a refresh and the settings menu buttons.
Tap on the refresh button update and the application will show what devices are connected to your WiFi network, specifying whether the router is a smartphone or a computer.
There are many other options in Fing, like sending reports, checking open TCP ports and the list goes on. Perhaps one of its best advantages is that users can change the viewed IP name, which allows the user to know who they are on the app and who the infiltrators are. Once you know who the trespassers are, simply click on the intruder and above you will see an option to  'enter a name '. Enter a new name for that IP address, like WiFi thief for example.

How to block unknown trespassing devices

In the event that you�ve located a intruding device, you are able to access the NAT and MAC information and connect to the router in order to block the unwanted guests from accessing WiFi in the future.
On your computer that connected to your router, enter your IP address into the browser. It will ask you for the password and username on your router and if you haven�t changed it, it will be specified in the device.
Now you�ll need to authenticate. The home page of your router will appear, showing a menu. Go to the security tab and enter a new password. (Remember, to connect to WiFi on your phone or your computer, you must enter this new password).
If this isn�t enough, you can block access for other devices entirely. On the Fing application, you will see information from your connected devices. Write down your MAC address (or your MAC addresses, depending on how many devices you have connected) on a piece of paper.
Search for the block devices option on the configuration page which you can open on your computer. In Access Control area, you can filter the MAC (one or more) that you've noted down. This will block any other invading addresses that try to infiltrate. Remember that if you choose this option no one else will be able to connect to your WiFi without having turned off the Access control option, which is good to keep in mind for friends or family who are visiting.

27 Mart 2014 Perşembe

How setup backup and restore conversations on WhatsApp

WhatsApp has become a universal communication app: several billion messages are sent every day through its services. After a short time, you can easily accumulate a ton of archived sentimental messages that you�ll either want to make sure to keep and save. However, with phones being lost, stolen, breaking, or some random freak of nature causing WhatsApp to lose your messages, it is advisable to make sure you back up on your own every so often. We�ll show you how.

1. Backup your WhatsApp conversations

  • Open WhatsApp from your App drawer
  • Press on the 3-dot menu icon on the top right
  • Tap on Settings, this will open the WhatsApp settings
  • Tap on Chat settings
  • Now, tap on Backup conversations to backup all the present messages


2. Extract WhatsApp backup database file for future restore

  • Connect your device to PC via USB cable
  • Open the device�s storage
  • In the root of the device�s storage, you will find a folder labelled WhatsApp, double click it open.
  • Now, go to the Databases folder
  • You will find all the backup database (db) files
  • Find the one with the latest date i.e today�s date when you have backed up
  • Copy that file, as in my case it is msgstore-2014-03-24.1.db.crypt5 to a secure location on your PC
  • You can now disconnect the device
  • Now, if unfortunately you lose your messages and also your database file from your storage, you can put back the saved database file into WhatsApp > Databases folder. Re-install the App and you will again be allowed to restore your messages.

Top 10 reasons Why you Root your Android Phone

Android is one of the most open, versatile, and customizable mobile operating systems out there. You may think you don't need to root your phone, but you'd be surprised at how much more you can accomplish with a little work. Here are 10 reasons rooting your phone is worth the hassle.
Now follow my this post you can see how can you root your phone.


Back Up and Restore App Data

The popular Titanium Backup app, which allows you to back up an app�s data and then restore it later, requires root access. Android apps aren�t supposed to be able to read other apps� data � that�s a security vulnerability � so this still requires root access. Much Android data is automatically backed up, but Titanium Backup allows users to back up everything and easily restore it, even data that wouldn�t normally be backed up.
Android includes some built-in backup features, but they�re hidden � you have to access them by plugging your device into a computer and running a special command. While the built-in backup features are so hidden and not all app data is backed up to the cloud, Titanium Backup is still very useful.

Change Your DNS Server

Want to change your Android phone�s DNS server and use a third-party DNS server like Google Public DNS for possibly improved speed, OpenDNS for web filtering, or Tunlr for easy access to geoblocked online media services?
Android doesn�t make this easy. You can change the DNS server for each individual Wi-Fi network you connect to, but you can�t set a preferred DNS server system-wide. This requires a third-party app like SetDNS. Sure, you could just change the DNS server on your router and you�d be okay when you were at home, but this wouldn�t help you when you were out and about. Android make this possible without rooting, but it�s extremely tedious.
Download Link

Remove Bloatware Completely

Android now provides a way to disable apps that were preinstalled by the carrier or device�s manufacturer. However, they�ll just be disabled � so they�ll still take up space on the device�s storage. With root access, you can delete the applications from the system partition, recovering the wasted storage and gaining the ability to use it for other things.
This isn�t necessarily recommended, as it can cause problems if you remove apps that the device needs. That�s why disabling bloatware apps is generally a better idea � but that�s little comfort if you don�t have much storage space left and you want to recover space wasted by bloatware.
Download Link

Gain Low-Level Hardware Access

After rooting your device, you can install a custom Linux kernel on it. This enables you to access features that require kernel-level changes. For example, Nexus 4 users can install the Touch Control app to wake their smartphones with a simple swipe on the display rather than a press often power button. This is implemented as a kernel module because it requires that low-level access.
Other commonly used features that often require custom kernels include display calibration, CPU downclocking (for more battery life), and CPU overclocking (for more performance.)
Download Link

Manage App Permissions

When you install an app, Android shows you the permissions the app requires. This is a take-it-or-leave-it offer � if you want to install a game but that game requires an obscene level of permissions, you can�t just deny individual permissions.
Root access allows you more control over app permissions on your phone, as this feature isn�t available to typical users. The good news is that Android 4.3 includes a hidden permissions manager named �App ops.� This feature likely isn�t stable and shouldn�t be relied on yet, but it�s hopefully a sign of things to come � with any luck, we�ll see a stable permission manager introduced in Android 4.4.
Download Link

Mount USB Sticks

It�s possible to connect a USB stick to your Android tablet using a standard USB OTG cable. However, Android doesn�t support USB sticks natively. If you�d like to connect a USB stick to your tablet so you can watch videos without wasting all your tablet�s storage, you�ll need root access and something like the StickMount app. This utility makes files on USB sticks available on the Android device�s file system so other apps can access them, but it requires low-level access available only to root users.
Download Link

Get Full File System Access

Root gives you full access to the system by definition, so it�s no coincidence that people who want full read/write access to the entire file system will require root. Root allows you to use file managers that can access the entire file system and even edit Android�s configuration files by hand in text editors � something hardcore Android tweakers may find useful.
Download Link

Adblock

We�re obviously an ad-supported website, so we generally don�t jump up and down telling everyone how to disable ads. However, it�s impossible to deny � one big reason many people root their devices is to block ads at the system level.
Many Android apps are free specifically because they contain ads, so using a trick to disable advertisements in the app when you could just spend $0.99 for the full, ad-free app isn�t very nice to developers. Don�t expect Google to make this feature stop requiring root anytime soon.
Download Link

Flash a Custom ROM

Okay, so you probably already know about this one�but it's one of the best benefits of rooting. A custom ROM is basically a custom version of Android, and it truly changes how you use your phone. Some merely bring a stock version of Android to non-stock phones, or later versions of Android to phones that don't have it yet. Some add a few handy featuressome add lots of really unique features, and some change your operating system from head to toe. No matter what phone you have�even if it's a Nexus�we highly recommend checking out the custom ROMs out there. You won't be disappointed. Note: As some of you have noted, you don't actually need root access to flash a custom ROM�though you will need to unlock your bootloader (a process that sometimes comes bundled with root access). Still, it requires freeing your device from manufacturer lockdowns, so we've kept it in the list despite this technicality!

Infinite Features

Beyond just customizing your phone's existing features, rooting helps you pile on all kinds of wonderful new weirdness. You'll love it.
Want to hook up your PlayStation controller to your phone for better gaming? You can. Want to set rules for callers to decide who can and can't call you when? Why not. Maybe your carrier has blocked certain apps, or an app isn't available for the country you live in? There are Market Enabler apps that trick your phone (and Google) into thinking it's on another carrier or in a far off land. Nervous about connecting to the public Wi-Fi? Wifi Protector will keep you safe from all kinds of ARP, DOS, and MITM attacks. Or, you could put the new Android 4.2 camera on your non-Jellybean phone. Accidentally deleted something you wish you hadn't? Undelete might just save your bacon. The possibilities are virtually limitless.
You also install Backtrek OS in Android Mobile

25 Mart 2014 Salı

Real FB Status & Pages Likes

AddMeFast helps you to increase Facebook Likes/Subscribe, Google +1/Circles, Twitter Followers, YouTube Views/Subscribe/Likes, Pinterest Followers, SoundCloud music listening and Website Hits.
  AddMeFast don�t sell likes/subscribes/followers/views/hits. They will never ask for your social network accounts usernames or passwords, and will never post, tweet or status update from your accounts.
Simply register your email and add your FB Profile ID ya Fb pages whatever you want. Now simply earn points liking other pages and your pages likes is also up. Enjoy the Free and legal like service.
   Try For FREE Now Real FB likes

How to Enable Developer Options on Android 4.x.x

The one thing that makes Android distinct as an operating system for mobile smartphones and tablets is its being an Open Source platform that encourages developers to engage in various types of development activities. And the one feature without which the custom development would not have been so easier is the availability of the �Developer Options� that is found under Settings of all Android devices by default.
These developer options contain advanced features that help any person with a developer�s bent of mind build, test, debug, and package Android apps and mods. In simple terms,  developer options allow quick access to and Android device from a computer via ADB (Android Debug Bridge) commands.

Features of Developer Options

The �Developer Options� feature is indispensable to Android Developers hackers and enthusiasts as a means to quickly access and control their device from the PC. Even if you are an average user and wish to root, install a ROM or mod on your Android device, you must turn on USB Debugging mode on your phone or tablet. And you�ll not be able to do it unless you enable Developer Options on your device first.
Among the most useful features that are  found under Developer Options are as follows:
  • Enable debugging over USB.
  • Quickly capture bug reports onto the device.
  • Show CPU usage on screen.
  • Draw debugging information on screen such as layout bounds, updates on GPU views and hardware layers, and other information.
  • Many other options to simulate app stresses or enable debugging options.
The �Developer Options� has always been visible by default in all previous versions of Android. On

Developer Options on Gingerbread (Android 2.3):

Settings> Applications> Development> USB Debugging

Developer Options on ICS (Android 4.0):

Settings> Developer Options> USB Debugging

Developer Options on JB (Android 4.1):

Settings> Developer Options> USB Debugging
If you have recently upgraded your device to Android 4.2 Jelly Bean or have bought a new device with 4.2 or higher pre-installed, do not be surprised if you find the  �Developer Options� missing. I came across this thing on my Galaxy S3 with leaked 4.2.1 firmware and then on Galaxy S4 GT-I9500 on Android 4.2.2.

Enable Developer Options on Android Android 4.2/ 4.3/ 4.4

In fact, the developer options lie at the core of Android development and so they cannot be removed as long as Android is an open source environment. The only change Android 4.2 brings in connection to these useful options is that now they are hidden by default  and you will have to make it available by doing some finger exercise.
  1. Open Settings> About on your Android phone or tablet.
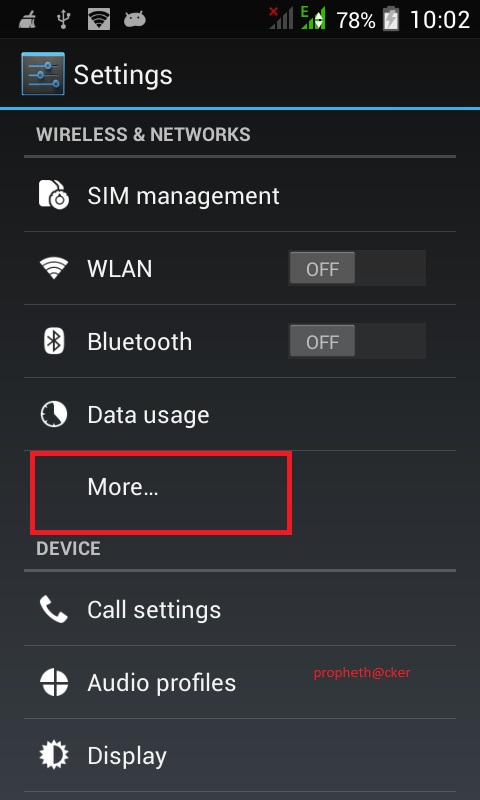
  2. If you have a Samsung Galaxy S3, S4, Note 8.0, Tab 3  or any other Galaxy device with Android 4.2 or Android 4.3, open Settings> More/General tab> About and tap it.
  3. If you have Galaxy Note 2 or Note 3 or any Galaxy device with Android 4.3, go to  Settings> General> About and tap the Build version 7 times.
  4. Now scroll to Build number and tap it 7  times.
  5. After tapping the Build Number 7 times, you will see a message �You are now a developer!� If you have a Galaxy S4 or any other Samsung Galaxy device with Android 4.2, the message reads as follows- �Developer mode has been enabled�.
  6. Return to the main Settings menu and now you�ll be able to see Developer Options.


8. Tap on Developer options and mark the box in front of  USB Debugging  to enable it.
9. To disable USB Debugging mode later, you can uncheck the box before the option
10. To enable Developer Options, go to Settings> Developer options and tap on the ON/OFF slider on the top of the page.


10 Things You Can Do In Android�s Developer Options